How to make the 3D puff embroidery design

ZdigitizingUSA


3D puff embroidery is a unique and eye-catching technique that adds dimension and texture to embroidered designs. This method involves adding foam padding underneath the embroidery stitches to create a raised, three-dimensional effect. While 3D puff embroidery may seem complex, with the right tools, materials, and techniques, you can achieve stunning results.
The first step in creating a 3D puff embroidery design is selecting the right design. Keep in mind that not all designs are suitable for 3D puff embroidery, as intricate details or small text may not translate well to the raised effect. Opt for bold, simple designs with clean lines and minimal detail for the best results. Additionally, consider the size and placement of the design on the garment or item to ensure that it will accommodate the 3D puff effect without appearing crowded or overwhelming.
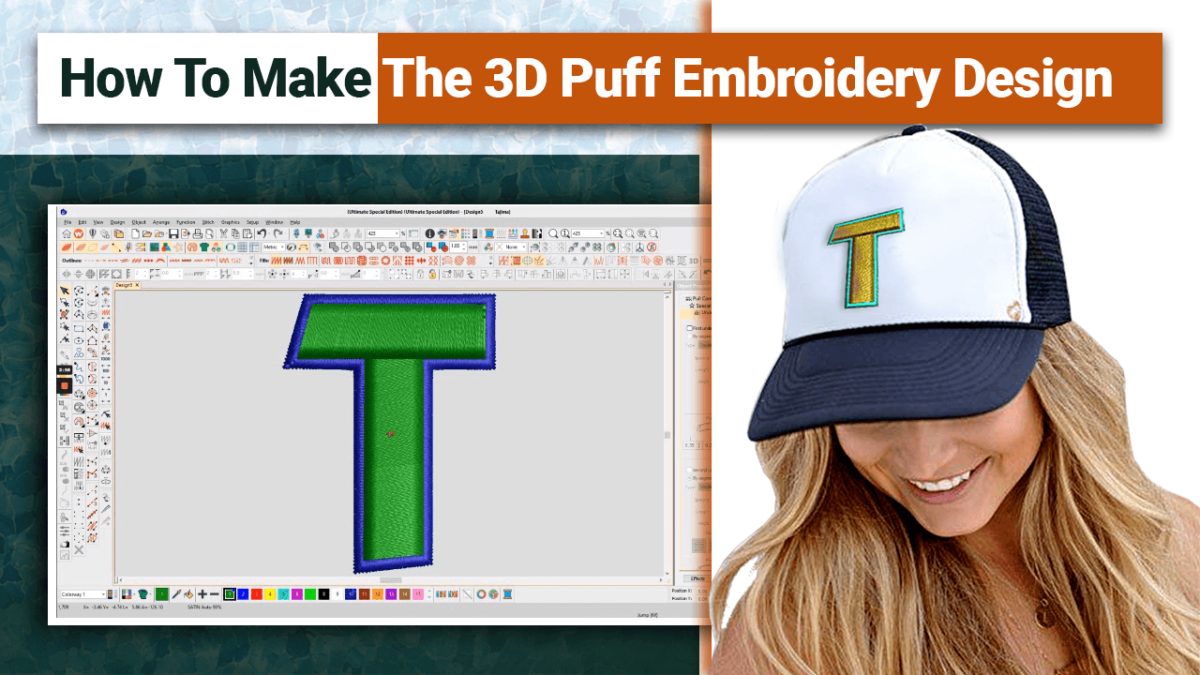
Once you’ve selected a suitable design, the next step is to digitize it for embroidery. This process involves converting the design into a digital file format that can be read by an embroidery machine. For 3D puff embroidery, it’s essential to use specialized embroidery digitizing techniques to create the foam padding underneath the stitches. Work with an experienced embroidery digitizing service like ZDigitizing to ensure that the design is digitized correctly for the 3D puff effect, with the appropriate underlay and stitch settings.
To create a 3D puff embroidery design, you’ll need a few key materials, including:
Before embroidering the design, it’s essential to properly hoop the fabric to ensure stability and accuracy. Place the fabric securely in the embroidery hoop, making sure it’s taut and wrinkle-free. If necessary, use stabilizer underneath the fabric to provide additional support and prevent puckering during embroidery.
Once the fabric is hooped and stabilized, it’s time to embroider the design. Load the digitized design file onto your embroidery machine and select the appropriate thread colors. Begin by embroidering the base layers of the design, following the digitized pattern. When it comes to areas that will have the 3D puff effect, such as text or shapes, stop the machine before stitching these areas.
With the machine paused, carefully place the 3D puff foam padding on top of the fabric, covering the areas designated for the raised effect in the design. Make sure the foam is positioned evenly and securely within the hoop, with no wrinkles or folds. Once the foam padding is in place, resume the embroidery machine to complete the stitching over the foam.
After the embroidery is complete, carefully remove the fabric from the hoop and trim any excess thread or stabilizer. Use sharp scissors to carefully trim away the excess foam padding from around the embroidered areas, leaving behind the raised 3D puff effect. If desired, you can further enhance the design by adding additional embroidery details or embellishments.
We initially established our embroidery digitizing company in 2002, which later expanded to become a worldwide digitizing business. We have a highly-skilled digitizing team capable of handling even the most challenging and complex designs with precision for embroidery digitization.
Our pleasure is to be embroidery digitizers and give embroidery digitizing and vector art services to embroiderers and printers worldwide. Our customers provide us photos of their logos, and we convert them into embroidery formats for use on computerized embroidery machines.
Creating a 3D puff embroidery design requires careful planning, precise execution, and attention to detail. By following these steps and working with experienced professionals like zdigitizing for embroidery digitizing, you can achieve stunning results that will impress and delight. Experiment with different designs, foam thicknesses, and thread colors to create unique and eye-catching 3D puff embroidery designs that stand out from the crowd. With practice and patience, you’ll master the art of 3D puff embroidery and elevate your embroidery projects to new heights of creativity and craftsmanship.

All Rights Reserved © 2023