Installing Batt Insulation Without Gaps

makeoverinsulation


Installing batt insulation without gaps is essential for maximizing energy efficiency, improving indoor comfort, and ensuring the long-term durability of a building. Gaps, voids, or compressed areas in batt insulation can significantly reduce its effectiveness by allowing air movement and thermal bridging. Whether you’re a contractor, builder, or homeowner, understanding how to install batts correctly ensures optimal performance and avoids costly issues later.
This comprehensive guide explores why avoiding gaps in batt insulation matters, technical installation steps, common mistakes, and key factors to consider before beginning any project. You’ll also find helpful tables, FAQs, and actionable advice for gap-free batt insulation.
Even small gaps in insulation can lead to major losses in performance. Thermal resistance, measured by R-value, assumes full and continuous coverage. When insulation is poorly installed—left with gaps or compressed—it allows convective air loops and cold spots, which undermine the thermal envelope of the home.
Gaps also allow for moisture intrusion and condensation buildup in wall cavities, which can lead to mold growth or material degradation. In colder climates, even small voids can reduce comfort and drive up heating costs.
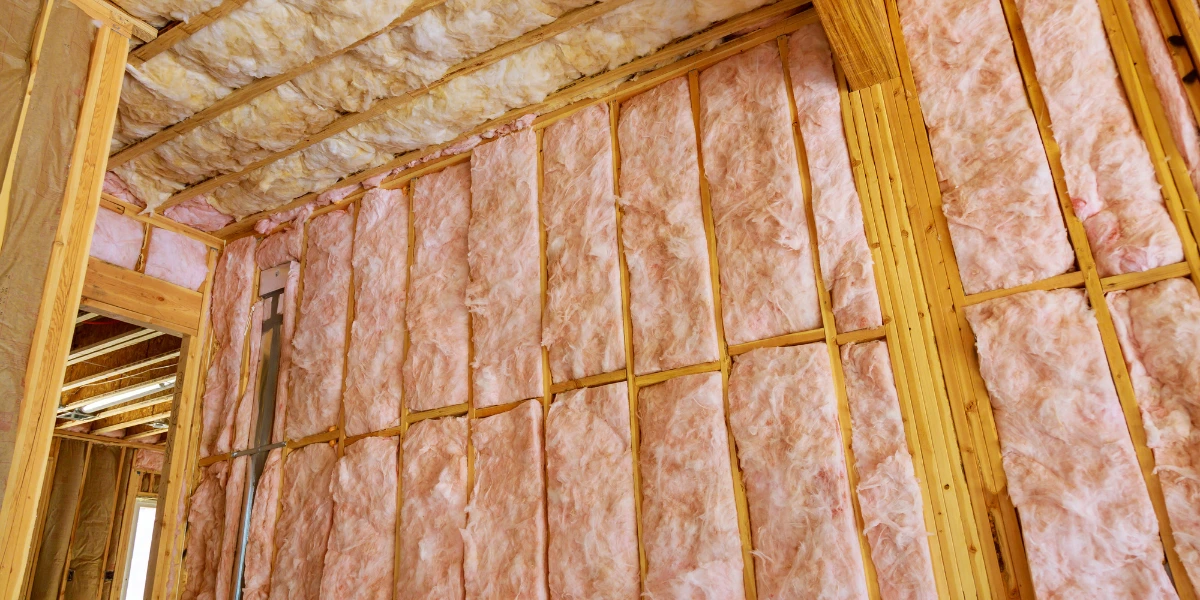
Properly installed batt insulation fills the entire cavity without leaving space for air infiltration or conductive heat loss. A tightly sealed insulation layer is essential to preserve the building’s energy efficiency and indoor air quality.
| Installation Type | R-Value Retention | Air Infiltration | Moisture Risk |
| Perfect Installation | 100% | Minimal | Low |
| Minor Gaps (1–2% coverage loss) | 85–90% | Moderate | Medium |
| Major Gaps/Compression | 70% or less | High | High |
The data above shows how small imperfections during installation significantly reduce performance. That’s why achieving a tight, gap-free fit is not just ideal—it’s necessary.
Begin by selecting the appropriate batt insulation type (fiberglass, mineral wool, or cotton) and ensure the dimensions match the cavity. Most residential walls are framed with 16″ or 24″ on-center studs, and batts are manufactured to fit these spaces. However, variations in framing may require trimming.
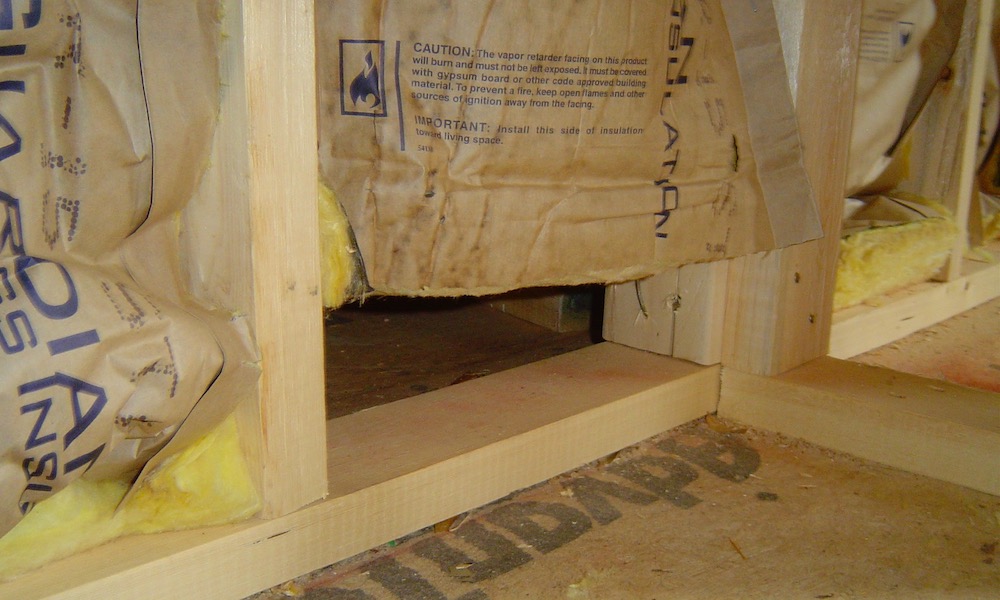
Use unfaced batts for interior walls and faced batts for exterior walls where vapor control is needed.
Accurate measurement is essential. Use a measuring tape to get the width and height of each cavity. Framing isn’t always uniform, so measure each space individually. Cut the batts ½ inch wider than the cavity to allow a snug, friction-fit installation.
Use a utility knife and straightedge to make clean, even cuts. Avoid tearing batts, as this creates uneven edges that don’t seal well.
Slide the batt into the cavity and press it gently into place. It should fill the space without bulging or compressing. Compressed insulation loses R-value, so avoid stuffing batts into tight spaces.
Make sure the batt touches all six sides of the cavity: top, bottom, both sides, back, and face. Use your hands or a wooden stick to fluff out corners and eliminate folds or voids.
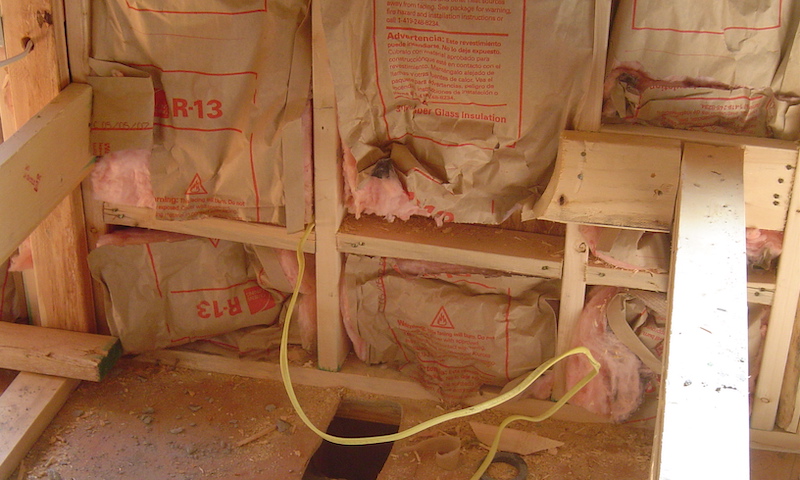
For wires, pipes, or electrical boxes inside the cavity, split the batt in half thickness-wise and place half in front and half behind the obstacle. Never push insulation around wires or cram it behind pipes.
Cut and notch batts to fit tightly around obstructions. The goal is continuous coverage—even where the framing is complicated.
Use small batt scraps to fill any remaining cracks or tight areas. Every portion of the cavity must be covered. Don’t leave voids or try to fill large gaps with expanding foam unless specifically approved for insulation compatibility.
Pay special attention to corners, top plates, and the bottom of the cavity, as these areas are often overlooked.
If you’re using faced batts, staple the paper flange to the front face of the stud. Avoid over-stapling or stretching the facing. For unfaced batts, ensure a tight friction fit so they stay in place without mechanical fasteners.
In ceilings or sloped areas, use mesh supports or wires to hold batts in position and prevent sagging over time.
| Material Type | Typical R-Value per Inch | Soundproofing | Fire Resistance | Moisture Resistance | Ease of Installation |
| Fiberglass | R-3.0 to R-3.8 | Moderate | Moderate | Low | Easy |
| Mineral Wool | R-3.7 to R-4.2 | High | Excellent | Moderate | Moderate |
| Cotton/Denim | R-3.4 to R-3.7 | High | Moderate | Low | Moderate |
Each material has its pros and cons. Mineral wool is ideal for sound reduction and fire safety, while fiberglass is lightweight and easier to cut and fit.
Insulation only performs at its rated R-value when fully lofted. Compressing batts into a smaller cavity reduces air pockets that resist heat flow.
Always insulate behind and around electrical boxes. Use cut batt pieces or specially shaped fillers to avoid cold spots.
Framing is rarely perfect. Always measure and cut for actual cavity dimensions rather than assuming standard sizes.
Some installers leave narrow cavities empty or poorly filled. Use scraps to fill these areas, or cut batts lengthwise to ensure complete coverage.
Look at your stud spacing and cavity sizes before selecting batt sizes. Irregular framing means more cuts and adjustments.
More wiring, plumbing, and HVAC lines mean more trimming and detailed fitting. Estimate additional time for careful installation.
Colder climates require higher R-values and tighter installation to minimize energy loss. Consider using higher-performance batts if needed.
New construction allows for easier batt installation than retrofits or remodels. Existing walls may require blown-in alternatives.
Yes, but only if there’s sufficient depth and the batts aren’t compressed. Layering should maintain loft and full cavity fill.
Use faced batts on exterior walls and ceilings where a vapor barrier is needed. Use unfaced batts on interior walls or when vapor control is handled separately.
Install support wires or netting across the joists every 18–24 inches to hold the batts firmly in place.
Split the batt thickness and place it behind and in front of the wire. Never compress insulation around wires.
If it remains clean, dry, and uncompacted, it can be reused. However, used batts may have reduced performance due to contamination or physical wear.
Installing batt insulation without gaps isn’t difficult, but it does require careful attention to detail. Each cavity must be treated individually, with accurate measuring, cutting, and placement. Obstructions should be fitted around—not ignored. Compressed or incomplete insulation doesn’t just reduce energy efficiency—it creates long-term building performance problems.
Whether you’re doing it yourself or overseeing a team, the goal is complete coverage, tight fitting, and no voids. Consistency across all framing bays will ensure your insulation performs to its full potential, helping occupants stay comfortable while reducing energy use for years to come.
Reviewer: Ava Clark contributed expert insights drawn from her experience managing residential insulation crews and consulting on building envelope projects across North America.